How to manage delivery drivers with WooCommerce
For those of us not living under a rock, it's no secret that delivery services are on the rise around the world. And for good reason, because we're all busier than ever and looking to cut down our to-do lists.
And for those of us really paying attention, it doesn't look like that growth will be slowing down any time soon.
Delivery Business Statistics
Recent food delivery stats are staggering: 86% of consumers are using off-premise services at least once per month and 1/3 are using it more than they did a year ago, said Melissa Wilson, principal with Technomic.
We can see that delivery is a $30 Billion dollar industry in these stats on consumer spending for food delivery services from 2015.
The cannabis industry in America in on the fast track to $24 Billion dollar yearly revenue and delivery services in the are popping up like, well … weeds.
In the U.S., the Courier, Express and Parcels market is hitting annual numbers over $60 Billion with a projected annual growth rate of 5% between 2015-2025.
And with 80% of retailers seeing a positive and measurable impact on customer satisfaction by offering multiple delivery options to shoppers, the revenue for delivery services will continue to grow.
With all of that potential money waiting for your business, are you prepared to give the best possible customer experience with every delivery?
The answer is simple; you can't afford not to.
It's your lucky day
Luckily for you, the Delivery Drivers for WooCommerce plugin makes managing your mobile workforce a breeze.
You have your business and you already offer your customers delivery options.
To keep up with the technological age, your business also has a website which is good.
Odds are your business website is built using WordPress, and you even have a WooCommerce shop to sell products directly through your website.
How are you managing the delivery of your orders?
Do you have someone from your company deliver the order, contact you and then you manually have to go in and update the order status to Completed?
Maybe you haven't even thought that far ahead and you haven't even set up delivery options through your WooComerce store.
No matter where you're currently at with your delivery business website, this article is going to help you streamline the delivery of your orders.
Setting up
The first thing you'll want to do is make sure that WooCommerce is installed and activated on your website.
If you do not have it installed yet, you can read their install instructions and then move on to the next step.
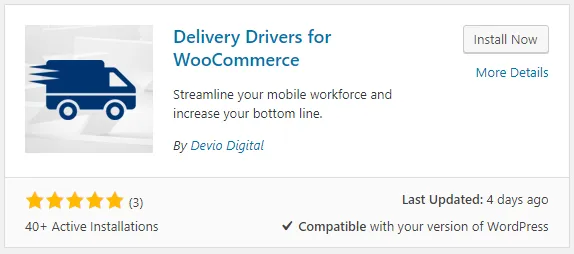
Installing the Delivery Drivers for WooCommerce plugin
After you've made sure that WooCommerce is installed, you're going to want to install the Delivery Drivers for WooCommerce plugin.
You can do this in your WordPress admin dashboard by going to Plugins -> Add New and searching for "Delivery Drivers for WooCommerce".
Click the Install** button and after it finishes installing, click **Activate.
Managing your drivers
Now that you've got the plugin installed, it's time to get your drivers set up in the system.
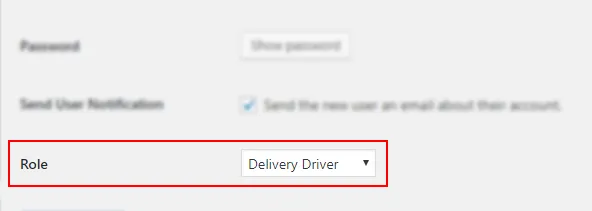
Adding new delivery driver users
Delivery drivers will be added in your WordPress dashboard the same way that you would add a new subscriber, customer, administrator etc.
First, you'll go to Users -> Add New.
From this page you can add in the drivers name, email address, username, and so on.
The part that you'll want to focus on when adding a new Delivery Driver is the user role section of the Add User page.
Assigning a driver to an order
Now that you've got your driver(s) added into WordPress, it's time to start assigning them orders.
First, you'll need to go to WooCommerce -> Orders and choose which order you'd like to edit. Once you're on the edit screen of your order, there's two updates you'll need to make.
The first update is to the Order Status, which you will now mark as Driver Assigned.
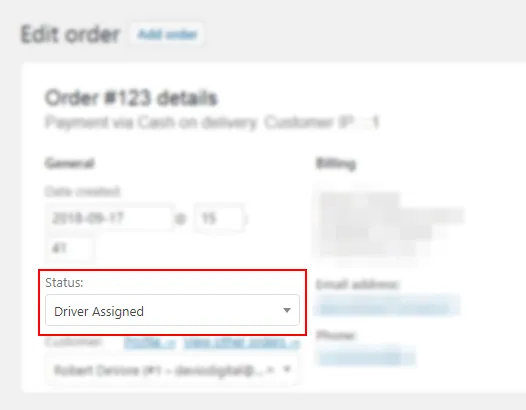 Driver Assigned Order Status
The other update is to the Delivery Drivers metabox on the right hand side of your screen. Here, you'll choose the driver that you'd like to assign to the order.

After you do this, click the Update button and you're all set.
In the DDWC Pro version, there is a setting that you can set to auto-assign drivers with each new order, saving you time by not needing to manually assign each order to a driver.
The capabilities your drivers have
From the drivers side, the plugin adds a new tab into the WooCommerce My Account page.
Once your driver is on the Delivery Drivers page, they're able to see a table of all assigned orders, and the ability to check a box that hides all completed orders.
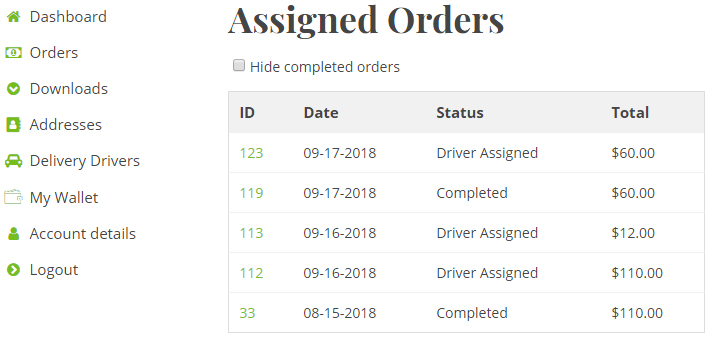 click to expand
Clicking on the ID# of an order takes the driver to a new page with all of the order details displayed for the driver to review.
 click to expand
When viewing the actual order details, the driver is able to call the customer or your dispatch center (depending on if you have the option active in your settings).
There is also a list of all items in the order, the delivery address (either text or a Google map, depending on your settings).
 Delivery drivers order details page
When the driver clicks the change status button, it will change the order status to Out for Delivery.
The button will change to then allow the driver to change the status to Completed after they've delivered the order.
In the DDWC Pro version, there is an email sent to the customer when the driver changes the status to Out for Delivery.
There's also an email sent to the administrator once the order has been marked as Completed.
Delivery drivers admin settings
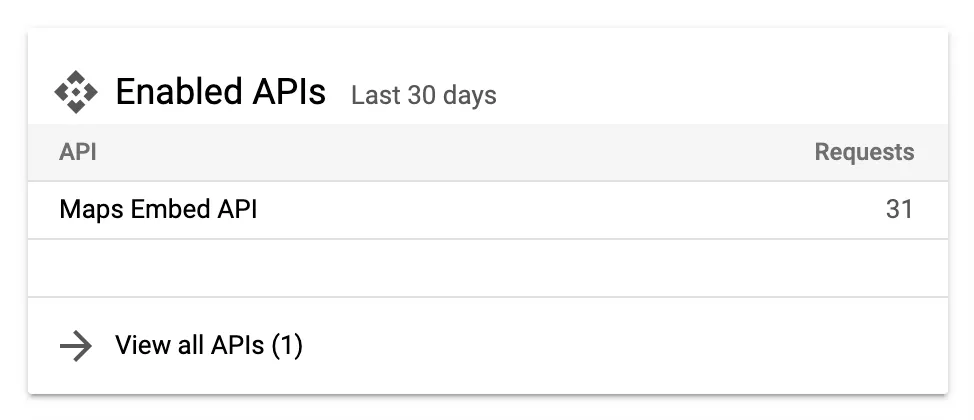
Speaking of the order details page, there is a Delivery Drivers tab added to the WooCommerce Settings page, which lets you add in a dispatch number for your drivers, and also a Google Maps API key.
Your Google Maps API key will need to have the "Maps Embed API" enabled.
When you add your API key in, it will replace the simple text address on the driver's order details page to an actual map of the location (as seen in the change status screenshot above)
 click to expand
What did we miss?
Are there any features that you don't currently see in the Delivery Drivers for WooCommerce plugin or the Pro version, but would like to?
Let us know in the comments, or reach out directly via the Contact Us page.